Cruise SVG Bundle: Practical Embroidery Review
When I first unzipped the Cruise SVG Bundle, I was looking for a design set that could move beyond digital prettiness and actually hold up under a sewing machine needle. As someone who tests embroidery files before they ever touch a customer’s sweatshirt or tote bag, I’ve learned that a sharp-looking SVG doesn’t always translate to clean stitch-outs. So I put this bundle through a realistic project workflow—starting with a custom embroidered tote bag for a local boutique order—and here’s what I found for anyone planning to use it in real handmade products, custom apparel, or commercial embroidery work.
First Impressions: A Design That Sails Right In
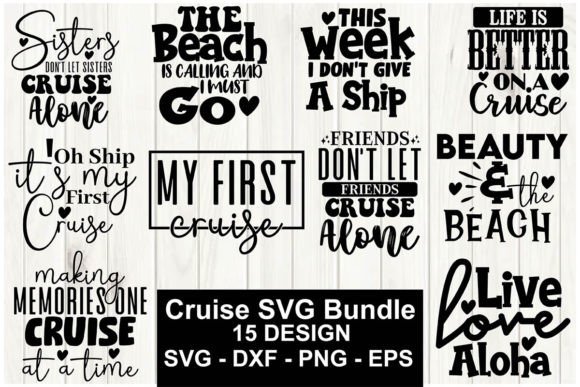
The Cruise SVG Bundle immediately gives off a relaxed, coastal vibe—clean outlines, playful nautical accents, and a layout that feels modern without being overly complex. The theme centers on cruise and ocean imagery, with silhouettes of ships, anchors, palm trees, and travel-inspired phrases. The shapes are bold enough that they won’t get lost in stitching, but also include enough detail to add character. For an embroidery designer, this kind of visual personality works well on items meant to evoke vacation memories, gift shop merchandise, or personalized travel gear.
Because these are vector-based graphics (SVG, AI, EPS, DXF, PNG provided), the lines are crisp and scaling is straightforward. I immediately thought of using them for machine embroidery design on a linen tote bag, a cotton sweatshirt, or even as an embroidered patch for a beach-themed gift set. The bundle’s mood is friendly, approachable—exactly what you want for a handmade product that needs to resonate with customers looking for something unique.
Real-World Test: Embroidering a Custom Tote Bag
For my test run, I chose the cruise ship silhouette from the bundle and digitized it as a single-color fill stitch design with a few satin stitch accents on the windows. I hooped a medium-weight cotton canvas tote bag. The design digitized smoothly from the SVG file, but I want to emphasize: always convert SVG to a proper embroidery file format (like PES, DST, or EXP) before stitching. This bundle supplies the source graphics, not native embroidery machine files, so you’ll need to use your own digitizing software or work with a conversion service.
Once stitched out, the shape held its clarity. The tote bag’s fabric was stable, so I used a medium-weight cutaway stabilizer and a 75/11 embroidery needle. The stitch density felt balanced—not too tight, not too loose—and there was no puckering along the edges. The design sat nicely on the front center of the bag, and the thread color (navy blue on a cream bag) popped without overwhelming the piece. I also tested a small wordmark from the bundle (“Sail Away”) on the bag’s side pocket, using a running stitch for the letters. It read clearly, even at a small scale. That’s a good sign for anyone planning to use these for personalized gifts or small shop merchandise.
Where the Cruise SVG Bundle Shines in Embroidery
After that tote bag test, I pushed the designs further—onto a sweatshirt, a baby onesie, and a cap. Here’s what worked best:
- Custom apparel: The overall shapes are large enough that they work on sweatshirts and t-shirts without looking lost. A palm tree silhouette in a fill stitch came out clean on a heavyweight hoodie.
- Tote bags and aprons: The bold line art translates well on canvas and denim. I can see these designs being popular for boutique craft fair items or Etsy seller listings.
- Embroidered patches: The cruise ship and anchor motifs have clear outlines, making them ideal for sew-on or iron-on patches. Just ensure your digitizing software creates a satin stitch border for a finished edge.
- Baby and holiday embroidery: The smaller icons (life preserver, starfish) fit nicely on onesies or pillow covers. For a holiday embroidery project, a cruise-themed gift for a traveling family would feel personal and unique.
- Commercial embroidery: If you plan to produce multiple items for a cruise-themed event or a travel agency, the bundle’s consistent style helps maintain brand continuity. Licensing is important here—verify the included license allows commercial use of the finished products. The product description mentions digital download files, but doesn’t spell out terms, so check the license before selling any finished items.
Use with Care: Small Hoops, Tricky Fabrics, and Detail Limits
No design bundle is perfect for every situation, and Cruise SVG Bundle has some practical limits worth noting. During my test on a baby onesie (stretchy cotton), the larger ship design caused slight distortion because the fabric wasn’t stabilized enough. I recommend using a tear-away stabilizer plus a layer of water-soluble topper on stretchy or textured fabrics to keep those satin stitch lines crisp.
- Small hoop sizes (4x4 or smaller): Some designs in the bundle, especially the full cruise ship with details, may need to be resized down significantly. When I tested the ship at 2.5 inches wide, the windows and small railings became too dense for the needle to penetrate cleanly. Always test on scrap fabric first to see how the design behaves at your target size. If you plan to use a small hoop, consider choosing the simpler silhouettes or phrase-only designs.
- Dark fabrics: Many of the graphics use fine internal cutouts (like the ship’s portholes). On a dark tee or tote, those openings can get lost if you use a light thread. I’d suggest a contrasting thread color or a white underlay to ensure the design reads clearly.
- Curved surfaces (caps, sleeves): The wide horizontal shape of some designs may not curve well around a cap’s front panel. Keep them compact or choose vertical-oriented motifs for hats.
- Products needing frequent washing: Because the designs are digitized (by you) from SVGs, the final stitch quality depends on your digitizing settings. For kitchen towels or baby bibs, use a tight satin stitch for details and back with a no-show mesh stabilizer to prevent distortion after laundering.
How It Affects Product Value and Customer Trust
In my experience, designs like those in Cruise SVG Bundle can elevate a handmade product’s perceived value when done right. A cleanly stitched cruise ship on a quality tote bag makes the item feel like a boutique piece, not a generic souvenir. That increases the giftability and helps small shop owners justify a higher price point. On the flip side, a poorly executed stitch-out—wavy lines, thread breaks, missed details—will undermine customer trust. That’s why the bundle’s clean vector shapes are an advantage: they give you a solid foundation for digitizing, but you still need to adjust stitch density, hoop size, and stabilizer choice for each specific fabric.
For digital product sellers who create printable mockups, the PNG files with transparent backgrounds are a huge time-saver. I used them to preview the design on mockup shots for a client’s Etsy listing. The crisp edges meant no messy cleanup in Photoshop. That’s a practical win for anyone building an online shop or designing design assets for other crafters.
Practical Embroidery Designer Notes
Before you commit this bundle to a customer order or your own product line, here are the steps I run through for every new set of graphics:
- Test on scrap fabric. Use the exact fabric type you plan to use for the final product. Adjust needle size, thread tension, and stabilizer based on the test results. For the Cruise SVG designs, I found that a 75/11 needle with cutaway stabilizer worked for medium-weight woven fabrics, but for stretchy knits I switched to a ballpoint needle.
- Check thread color contrast. The bundle gives you vector outlines—the final look depends entirely on your thread palette. Use contrasting colors to make the details pop, especially for the small shapes like anchors or ship wheels.
- Review stitch density in your software. Import the SVG into your digitizing program and examine the stitch density of each element. If the design seems too dense after reducing it to a small size (say under 3 inches), simplify the detail or use a larger hoop. Don’t force a design into a tiny hoop if it loses clarity.
- Verify hoop size compatibility. The bundle doesn’t specify recommended hoop sizes because it’s not an embroidery file set; it’s a graphics set. So you’ll need to measure your digitized design against your machine’s maximum hoop area. I recommend setting your design to at least 4 inches on its longest side to retain the detail level shown in the previews.
- Confirm licensing for commercial use. The product description lists “15 SVG file – 15 PNG file with transparent background. – 15 DXF file – 15 EPS file – 15 Ai file.” It’s labeled as Crafts and Graphics. It doesn’t explicitly state a commercial license, so contact the seller or read the terms before using these for commercial embroidery or selling the finished products. When in doubt, assume personal use only until confirmed otherwise.
- Test black-and-white mockups. Convert the design to a single-color outline in your software to see how it will read as an embroidered logo. Some of the more intricate elements (like the ship rigging) may need to be simplified for embroidery. The bundle’s SVG format makes editing easy—remove or combine small nodes before digitizing.
- Consider the stabilizer-to-fabric ratio. For the tote bag test, I used a medium-weight cutaway. For a soft sweatshirt, a tear-away stabilizer with a mesh topper gave cleaner satin stitches. The design’s open areas (like the sky around the ship) mean there isn’t a lot of stitched surface; that’s fine, but make sure the stabilizer is strong enough to support the stitched elements without shifting.
Final Thoughts on the Cruise SVG Bundle
As a working embroidery designer, I appreciate bundles that don’t overpromise. The Cruise SVG Bundle is a solid set of graphics with a clear theme and good structural clarity for digitizing. It’s not a plug-and-play embroidery machine file—you’ll need to do the conversion and testing yourself—but the vector quality saves time during preparation. For anyone running a craft business, making handmade products for an Etsy shop, or producing personalized cruise-themed gifts, this bundle can be a versatile asset. Just remember: the real value comes from the stitch-out, not the screen preview. Take the time to digitize thoughtfully, test on real fabric, and adjust for your specific product. That’s how you turn a downloadable graphic into a piece that people actually want to buy and keep. The cruise theme is timeless, and with careful embroidery execution, these designs can sail confidently onto totes, sweatshirts, patches, and beyond.